Hiking for Beginners: 10 Important Hiking Tips
Hiking is an incredible outdoor activity that offers a variety of impressive benefits. If you want to start hiking, but you have no idea where to begin, you’ve come to the right place! Thanks to these important hiking tips for beginners, you’ll learn how to pick the right trail, which gear you definitely need (and which pieces you can skip for now), how to stay safe, and more!
This post may contain affiliate links for which I may be compensated. As an Amazon Associate I earn from qualifying purchases.
When you’re ready to head outside and explore the beauty of nature using your own two, this guide on hiking for beginners is ready to help.
Hiking for Beginners: What You Need to Know
1. Choose the Right Trail
The one thing that holds many new hikers back is simply not knowing which hiking trail to choose. Don’t let all your options overwhelm you. Instead, start small and easy and work your way up to the challenging hikes.
Related: How to Avoid Becoming Lost When You’re on a Hike
There are plenty of places where you can find hiking trail recommendations for all skill levels, including guide books, apps, and websites. You can even check out our category of hiking trail recommendations! When you’re trying to find the right trail, there are a few key considerations to keep in mind.
- How Long Is the Trail? You need to think about how many miles you’re comfortable hiking. Keep in mind that the average walking speed is around 3 miles per hour. However, your pace might be slower depending on how much weight you’re carrying in your backpack, the elevation gain, and the difficulty of the terrain.
- What’s the Elevation Gain? One mistake that a lot of beginner hikers make is not accounting for elevation gain when they’re planning a hike. If you’re just starting out, remember that an elevation gain of 1,000 feet in one mile is considered pretty steep. Also, keep in mind that for every 1,000 feet you gain in elevation, you should add one hour to your trip. The more you hike, the more you’ll know how much elevation gain you can comfortably handle.
- What’s Your Fitness Level? Before you decide which trail to hike, you need to take an honest assessment of your fitness level. It’s OK if you’re not in the best shape of your life. There are trails out there for everyone. You simply want to make sure you’re choosing a trail you’ll actually enjoy instead of one you suffer to complete.
- Are There Any Logistics to Figure Out? Some trails require a little extra planning to complete. For example, while a loop trail and an out-and-back trail will bring you back to where you started, some trails will start and finish in different places. You’ll need to figure out whether a shuttle will bring you back to your vehicle or whether you need to have a friend drive your vehicle to the end point.
2. Check the Weather
Once you know which hiking trail you’re going to tackle and when you’re going to take your hike, you’ll want to start checking the weather forecast about a week before your trip. This will help you know how to dress and if you need to bring along any extra gear.
It will also give you an opportunity to change plans if the weather looks like it’s going to be particularly bad. Remember, a little rain doesn’t have to cancel your hike, but you definitely don’t want to be outside in thunder and lightning.
Related: Winter Hiking Tips: How to Stay Warm and Dry
3. Tell Someone Your Plans
Telling someone where you’re going and the absolute latest you expect to be done is crucial if you’re hiking alone. However, even if you’re hiking with a group, you should still leave a detailed itinerary with a friend or family member. You don’t want everyone to assume that someone else is doing it and then have no one do it!
You can also leave a note in your car that details your plan. One of the first signs of trouble is a car that has been left alone in a parking lot for too long. If a search-and-rescue team needs to come looking for you, they’ll likely check your car for information first.
Just don’t leave your note on the outside of your car where weather or people could destroy it. Instead, simply leave it folded on the driver’s seat.
Related: How to Use an Emergency Whistle to Signal for Help
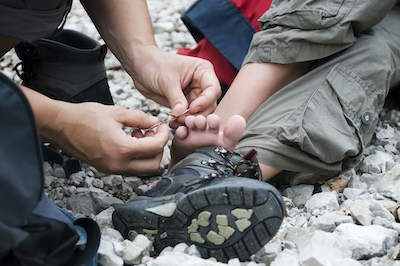
4. Wear the Right Socks and Boots
One of the great things about hiking that sets it apart from other hobbies is that don’t you need a ton of expensive gear to get started. That being said, two of the most important pieces of hiking gear you need to get are a good pair of hiking boots and the right hiking socks.
If you’re not sure where to start when you’re looking for the right pair of hiking boots, check out our guide on the best hiking boots for women and the top hiking boots for men.
A lot of hikers will spend weeks trying out different hiking boots before finding the right pair. But then they don’t think twice about grabbing a random pair of socks out of their drawer. Believe it or not, wearing the right pair of hiking socks is crucial for pain-free feet during hikes. This guide on the best hiking socks will help you pick out a pair that will perfectly suit your needs.
When you find the right boots and socks for hike, don’t forget to properly break them in so they feel comfortable on your hike!
Related: How to Prevent Blisters When Hiking
5. Wear the Right Clothes
Once you have your boots and socks, it’s time to consider the rest of your wardrobe. Avoid wearing cotton when you hike. This material easily absorbs sweat and takes too long to dry once it gets wet. Not only does this increase the chances of chafing or blisters, but it can also increase your risk of hypothermia if the temperature starts to dip.
Related: The Best Hiking Pants for Women
Instead, look for quick-drying, moisture-wicking fabrics, such as polyester or wool. You should also wear layers that you can shed or add during your hike. This makes it easier to adjust to changing body and air temperatures.
6. Pack the Right Gear
After you get your boots and clothes situated, it’s time to focus on your gear. If you’re heading out on a short day hike, you don’t need to bring along a ton of extra gear. Not sure what to pack? Check out this guide on what to bring on a hike.
Related: How Much Water Do You Need for a Hike?
Of course, you’ll definitely need a decent hiking backpack to hold everything.
Once your hikes start taking you farther away from civilization, you might want to consider also bringing along some of these hiking survival gear essentials for extra peace of mind.
Related: The Best Water Filters for Hiking
7. Understand the Local Wildlife
Many newbie hikers are nervous about encountering wildlife on the trail. Doing your research and understanding how to handle different types of wildlife can help prepare you for any possible encounters. Remember, most animals don’t like being around people and will naturally try to avoid humans as much as possible.
If you stick to hiking popular trails during busy hiking times, such as weekend afternoons, you’ll lower your chances of coming across wildlife on the trail.
If you do happen to encounter animals while you’re hiking, remember to stay calm. Slowly back away, and leave the animal alone.
Never run away from a predator. To them, running indicates that you’re prey and something they should chase.
8. Know How to Handle Your Bathroom Business
Taking care of bathroom business on a hike is one of those quirky hiking for beginners tips that you think you’ll never have to deal with, but you’ll be glad to know in case you ever do!
Most hikers take care of their bathroom business before they head out on the trail so they don’t have to worry about it when they’re hiking. However, sometimes you absolutely must answer nature’s call when you’re on the trail.
Don’t worry. This is something countless people have been able to do (including me!) and you can do it too.
If you have to pee, find a place that’s well away from the trail for privacy. You also want to make sure your spot is at least 200 feet (about 70 steps) from water sources.
Now, men, you obviously have it much easier. Ladies, we have several options. Some women just give themselves a good shake when they’re done. I prefer to pack either toilet paper or reusable cloth wipes in a plastic bag in my backpack. When I get home, I can either put the toilet paper in the toilet or wash the cloth wipes.
Going number two can sometimes be a little trickier, but it’s still possible.
Again, make sure you find a place that’s well off the trail and at least 200 feet from water. You’ll need to dig a hole that’s around 4 inches wide and 6 to 8 inches deep to bury your poo. A camp trowel can make this much easier.
Some hikers will use natural materials like leaves or moss as toilet paper. I still prefer using toilet paper just because I don’t want to accidentally use anything that’s poisonous or could cause an allergic reaction.
Just because you’re using biodegradable toilet paper, doesn’t mean you should bury what you use into the hole. The right thing to do is to bring a waste bag with you and toss the used TP into it. It’s simple and the sanitary thing to do.
Additionally, packing out is not only for toilet paper. Keep in mind that some heavily traveled, high-elevation, or sensitive areas will require you to pack out solid human waste. If that’s the case, you’ll want to make sure you bring along some human waste disposal bags.
Once you’re done, always use some hand sanitizer to clean your hands! You can check out our post on how to use the bathroom in the woods to learn even more helpful tips.
9. Understand Trail Etiquette
Just like roadways, trails have their own rules and etiquette that everyone is expected to follow to keep things flowing smoothly. When it comes to right of way, keep the following rules in mind:
Hikers and Other Hikers: When you meet another hiker, the person going uphill always has the right of way. Sometimes you’ll see uphill hikers let those coming downhill pass so they can stop to take a rest, but remember to leave that decision to the uphill hiker.
Hikers and Mountain Bikers: When mountain bikers and hikers are sharing the same trail, mountain bikers are normally expected to yield to hikers. However, since mountain bikers are typically moving faster than hikers, it’s usually easier for hikers to move to the side and let bikers have the right of way.
Hikers and Horseback Riders: Horseback riders always have the right of way on a trail. If you’re passing a horse and rider on the trail, give them a wide berth and don’t make any sudden movements. You don’t want to accidentally spook the horse and have it throw its rider. When you’re yielding to a horse, try to step off the trail on the downhill side for safety considerations.
Of course, when in doubt, it always easier to give the other person a friendly smile and let them have the right of way.
10. Leave No Trace
The final hiking for beginners tip to keep in mind deals with the principles of Leave No Trace. While most of us don’t set out to intentionally harm the environment, we also don’t realize how our actions can leave a lasting impact.
Simply put, the Leave No Trace Seven Principles remind us to follow the best practices that let us enjoy our surroundings and protect them for future generations to enjoy.
The Leave No Trace Seven Principles are:
- Plan ahead and prepare.
- Travel and camp on durable surfaces.
- Dispose of waste properly.
- Leave what you find.
- Minimize the impact of campfires.
- Respect wildlife.
- Be considerate of others.
Hiking for Beginners
Thanks to these tips on hiking for beginners, you don’t have to feel intimidated when you’re getting ready to step foot on the trail for the first time. Instead, you can get out there and enjoy all of the amazing benefits hiking has to offer!
More Outstanding Hiking Tips
Did you enjoy this guide on hiking for beginners? Are you looking for even more excellent hiking tips? Then please be sure to check out some of our other popular posts:
- How to Have a Whine-Free Hike With a Toddler
- The Best Trekking Poles for Hikers
- Top 10 Hikes in Great Smoky Mountains National Park
- Best Hydration Packs for Every Type of Hiker